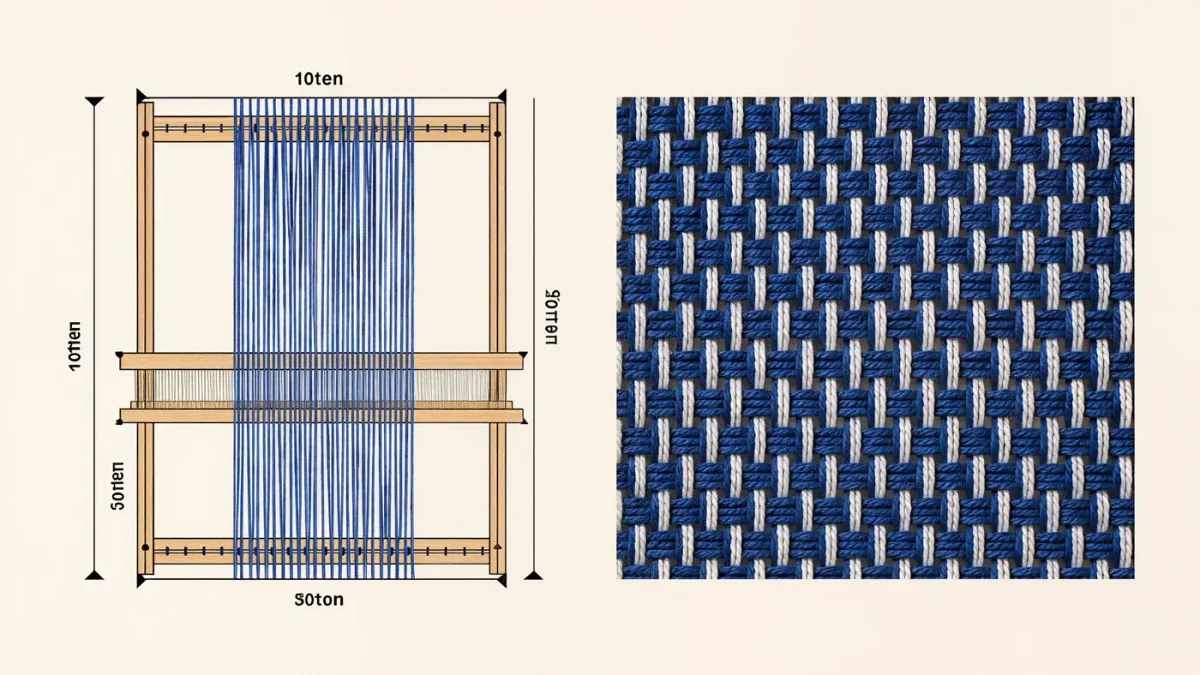
Weaving on a frame loom begins with a well-spaced warp: non-stretch cotton threads wound around the frame, about half a centimetre apart for a double-knitting-weight weft. Plain weave — the weft passing over and under alternate warp threads, alternating each row — builds the cloth from there, with no more kit than a needle, a fork and patience.
What does warping well actually mean?
The warp is the skeleton of the cloth, so its two properties, tension and spacing, decide how the finished piece behaves. Even tension means every thread feels alike when plucked — like the strings of one guitar, not twelve different instruments. If some threads are tight and some loose, the weft packs unevenly and the weaving puckers the moment it leaves the loom.
Spacing follows the weft yarn: a double-knitting-weight weft sits comfortably at about one warp thread every half centimetre, while finer yarns want closer warps and chunky yarns want more room. A quick physical test settles it — the weft should nest between two adjacent warps without forcing them apart. Cloth structure does the rest: plain weave, the over-under of every first textile, alternates its pattern each row so the fabric locks itself together. Weavers can trace that same structure across thousands of years of handwoven cloth in the Smithsonian's open-access archive.
Plan the size before the first thread is tied, because the warp decides everything downstream. A 25 × 35cm frame weaves a piece comfortably smaller than its outer dimensions: the unwoven margins at top and bottom, and the take-up of the weft itself, both subtract from the finished cloth. A first piece the size of a paperback book is a realistic expectation, whatever the frame appears to promise.
What does a first frame-loom project need?
One frame and a shoebox of yarn:
- A frame loom or sturdy picture frame, around 25 × 35cm
- One ball of strong, smooth, non-stretch cotton thread for the warp
- About 100g of double-knitting-weight weft yarn in two or three colours
- A large-eyed weaving needle
- A shuttle, or a strip of strong card with slits cut at each end
- A dinner fork or wide-toothed comb for beating the rows
- Sharp scissors and a dowel or stick, if the piece will hang
How do you warp and weave a first piece?
- Tie the warp thread to the bottom bar of the frame with a double knot, then wind it up and over the top bar and back down, keeping every pass parallel so the warp lies in one flat plane rather than spiralling around the frame.
- Keep the spacing even as you go — about half a centimetre between threads for a double-knitting-weight weft — and check tension by plucking each new thread against its neighbours. Stop and tie off at the top bar with a double knot, leaving a tail to darn in later.
- Weave a header: a few rows of plain weave with a plain, warp-like yarn near the bottom bar, beating them firmly. The header spreads the warp evenly and gives the weaving something to push against.
- Thread the weft yarn into the weaving needle and pass it over and under alternate warp threads across the row, leaving the yarn in a gentle arc — the bubble — rather than pulled straight.
- Beat each completed row down against the last with the fork or comb. As the bubble settles, the weft takes the shortest path; skipping the arc pulls the sides of the weaving inward, the classic beginner fault called draw-in.
- Return the needle across the next row in the opposite direction, alternating the over-under sequence — over where the last row went under. That alternation, row after row, is the entire logic of plain weave. Change colours by starting the new yarn at the selvedge and leaving a tail to darn in at the end.
- Stop weaving 2–3cm short of the top bar, so there is warp left to finish with. Trim, tie overhand knots in warp pairs along the top and bottom, or slip the loops off onto a dowel if the piece will hang, then darn in every weft tail at the back.
Why does the weaving pull in at the sides?
Almost always because the weft was pulled tight across the row. Taut weft drags the outer warps inward with every pass, and the cloth gradually narrows into an hourglass while the warp threads crowd towards the middle. The arc prevents it: laying each row down slack, in a shallow rainbow, and letting the beat — not the pull — set the weft in place keeps the sides straight.
The quieter faults are skipped beats, which leave rows loose and gappy; uneven warp tension, which puckers the finished piece off the loom; and stretchy warp yarn, which sags as the weaving builds and should be swapped for firm cotton. None of these ruins a first piece — they simply teach the hands what to feel for in the second.
From plain weave the whole family of techniques opens up in order: stripes and colour blocks first, then soumak braid for raised edges, rya knots for fringe, and shapes formed by weaving partial rows. Every one of them begins on the same humble frame, with the same well-spaced warp. And a loom left warped and waiting on a wall makes the next beginning nearly effortless, which is precisely how the second piece gets started.
For more context, read Five embroidery stitches for beginners carry almost every pattern.
For more context, read cut-paper collage techniques.
For more context, read Paper marbling for beginners starts with a carrageenan bath.